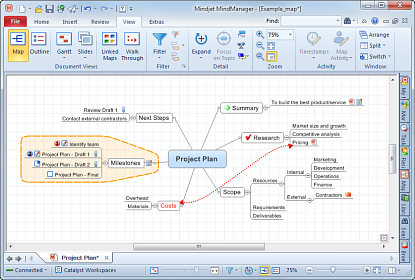
MindManager starts in Map view. This is the best view for creating and editing your maps and for getting the big picture of what the map covers. This view displays all the components of your map including floating topics, relationships, images and boundaries. You will probably do most of your work in this view.
For smaller maps, navigation is straightforward using the mouse. For large maps you may find it helpful to collapse and expand topics to make it easier to move around the map.
What do you want to do?
To switch to Map view from another view click Map
in the View tab Document
Views group, or click Map view
![]() in the Status
Bar.
in the Status
Bar.
You can also navigate through maps efficiently using the keyboard:
Keystroke |
Action |
Arrow keys |
Select the topic above or below or to the
left or right of the current topic. |
TAB, SHIFT+TAB |
Move to the next or previous topic, callout or subtopic. Use this method to visit each topic on the map in order. Floating topics and callouts attached to relationship lines are skipped. |
For more information see Keyboard shortcuts.
There are several ways to orient the map in Map view.
To move the map use the scroll bars along the map sides and bottom, or click on the map background or on the central topic and drag it.
Do one of the following:
On the Status
Bar drag the Zoom Factor slider ![]() to the desired
magnification level, or click
to the desired
magnification level, or click ![]() Fit Map to fit the whole map into the window..
Fit Map to fit the whole map into the window..
On the View tab, in the Zoom group, click the Zoom In / Zoom Out buttons, or click Fit Map.
On the View tab, in the Zoom group, click a value in the Zoom Factor box, or enter a value and press ENTER.
For wheel-mouse users hold the CTRL key and use the wheel to zoom in and out.
Press CTRL+F5 to fit the whole map into the window.
Press ALT+ F3.
Do one of the following:
On the Status
Bar, click the Expand arrow
![]() , and then click Collapse
Map.
, and then click Collapse
Map.
On the View tab, in the Detail group, click Collapse Map.
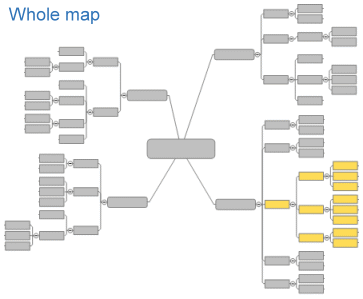
Use the Mini View window to navigate quickly through large maps.
Display the Mini View window
When you first open the Mini View window, you'll sees a small simplified version of your map with a boundary line enclosing the active viewing area. You can move this window to keep it out of the way as you work on the map. Use the Mini View window
|
|
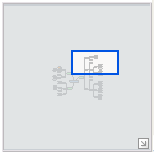
The Focus on topic command is especially useful for presenting larger maps in meetings, to enable the viewer to see the topic's details without being distracted by the rest of the map. It shows the selected topic expanded to an optimum level, its sibling topics (collapsed), main topics (collapsed) and the central topic.
Select the topic.
Do one of the following:
On the Status
Bar, click the Expand arrow
![]() , and then click Focus
on Topic.
, and then click Focus
on Topic.
On the View tab, in the Detail group, click Focus on Topic.
Press F3.
If you want to expand the topic completely, press SHIFT+ALT+. (period).
The Show Branch Alone command (available in both Map view and Outline view) shows only the selected topic and its descendants. See an example of these commands ▼
It is not necessary to delete map elements that you do not want shown on your map. Instead, you can use the Show/Hide command to hide elements or topics in Map view. This can be convenient when you add information that is for your own reference and you want to print or distribute the map or use it in a presentation.
Note that Walk Through view has its own Show/Hide command.
On the View tab, in the Detail group, click Show/Hide.
Click the elements you want to show or hide.
You can split the map view either horizontally or vertically so you can see different sections of the map at the same time.
When the map view is split, the two panes can be viewed independently. This means in each pane you can select different objects, use a different zoom factor or level of detail, and even use different filters, or different views. The two views are kept in sync: Any changes you make to the map are immediately reflected in the other pane.
This is especially convenient when working with large maps. For example, you can display the entire map in one window to get an overview, and work on it, zoomed in, in the other window.
Do one of the following:
On the View tab, in the Window group, click Split, and then click Horizontal or Vertical.
Right-click the map's workbook tab and click Split Map Horizontally or Split Map Vertically.
On the View tab, in the Window group, click Split, and then click Remove Split.
Right-click the map's workbook tab and click Remove Split.